Best Microphones for Recording Your Own High-Quality Podcast in 2020

jonathan-farber-Zxdf_tN9eC8-unsplash+(1)-2.jpg

Are you looking into recording your own podcast at home but don’t know what kinds of microphones to use? These are the best microphones for recording your own high quality podcasts in 2020!

These are separated into USB Microphones and XLR Microphones. USB mics are easy to set up, and usually can be attached directly to your computer, while XLR mics require a different port and additional equipment to be set up. Are you ready? Let’s get started.

USB Microphones


AT2020-USB

This is one of the first mics Jony Studios ever used! It’s a great starter microphone that does the job well. It offers a wide dynamic range and a low mass diaphragm that is engineered for an extended frequency response. It works great for recording podcasts.

61Lkq6BZ3bL._AC_SL1500_ (1).jpg


ATR2100x-USB:

The prices vary depending on where you buy it from, but it averages for above $100. This mic has both USB and XLR connections, and is fairly portable. It has versatile uses from singing, to podcasting, and recording live. It also includes all the cables needed to set it up.

 
71ueNCONiwL._AC_SL1500_ (1).jpg
 

Rode NT-USB:

This mic is ideal for voice recording, and includes items such as a travel pouch, tripod, and boom mount. The cost averages around $100. It also features a zero-latency stereo headphone monitoring jack, which allows you to keep track of the microphone input in real time.

 
811orzrhkXL._AC_SL1500_ (1).jpg


XLR Microphones


Rode Podmic:

This mic is optimized for podcasting, and usually sells for under $100. It has an internal filter and internal shockmounting so you can get the best sound quality possible.

blank_2_4_94 (1).png
 

Rode Procaster:

This mic is ideal for podcasting and voice overs. It has a great sound quality, and has an internal pop filter to help minimize plosive sounds.

 
1 (1).jpg
 

Heil PR-40

This mic is great for podcasts, although on the more expensive side, the sound quality lives up to the price.

 
51Dy8FHXgLL._AC_SL1280_ (1).jpg


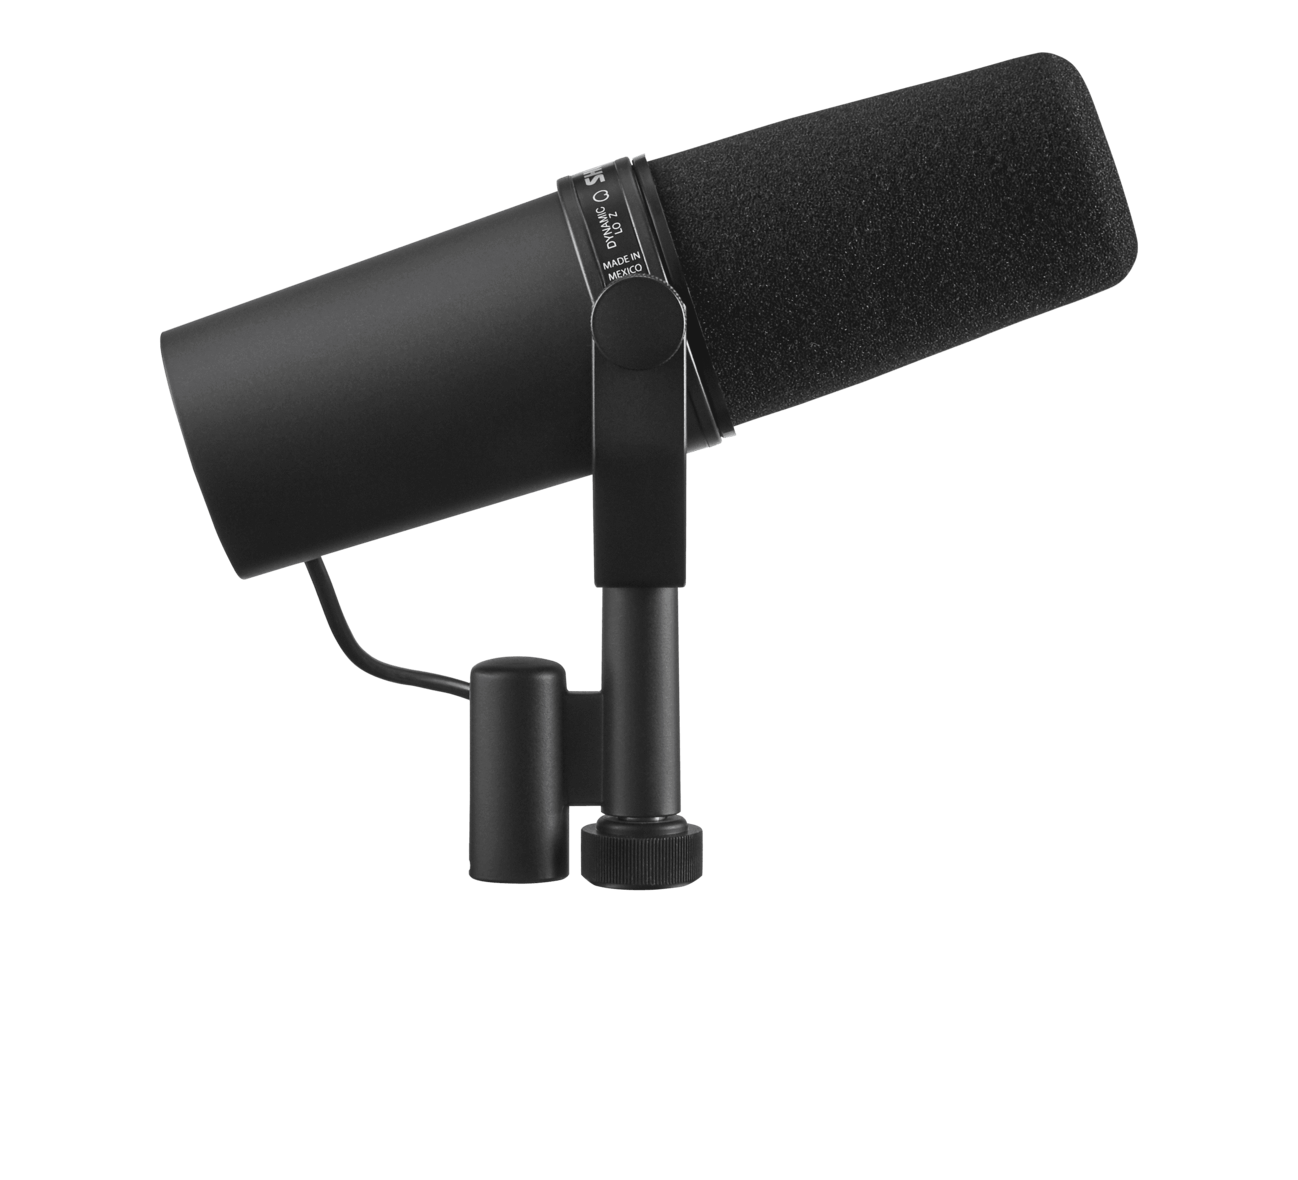
Shure SM7B:

This mic is known for its appearances on multiple broadcasts. It has a built in pop filter and shockmount, so the need for further upgrades is none. This is also our personal favourite!

2f6624083c02f59a68f1829dd8ab5b70 (1).png
 

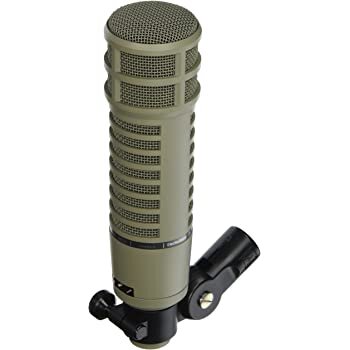
Electro-Voice RE20

This mic is also great for broadcasting, and is great for those who are new to microphones. It features an internal pop filter for close-in voice work, and an internal element shock mount, that can help reduce vibration induced noises.

81ci9qeDznL._AC_SS350_ (1).jpg
 

Conclusion

All of these mics have various qualities that make them great. In the end, make sure to use the one that best suits your specific needs. The most important part of podcasting is conveying value through your message to connect with your audience. Quality is just one minor aspect of this. If you need help making your podcast be the best it can be, contact us here.

So which mic are you interested in getting? Let us know!

- By Julianna Martinek


5 Simple Steps to Start Recording High Quality Music at Home

5StepsBlogPhoto.jpg

We are living in weird times. Everyone is working from home and self-isolating due to the coronavirus. Luckily, there is always a silver lining! More time at home, means more time to be creative and record those songs you’ve really wanted to release. I started my recording studio business at my parent’s house in my room, when I was 15 years old.

Now, I have been blessed to work with amazing musicians and companies, become a certified mentor for an LA based University, the Recording Connection, and win various awards.

I want to show you how I was able to get started, so you can have the opportunities I have had, plus more!

Here are the 5 simple steps to start recording high quality music from home:

1. Decide the type of music you will be recording

The first step in your recording journey is to know what type of music you will be making. The gear you will have to invest in will depend on that. For example, if your goal is to make instrumental, hip-hop beats and sell them to artists, you won’t even need a microphone, compared to if you want to record your entire rock band, you will need a lot of different types of mics! In my case, when I started I just wanted to record myself and others in a variety of genres using programmed drums and live drum samples for the beats. This is because I didn’t have drumming skills or the room to have a full drum kit! I was able to crack the code and get really good results. You can check out a sample of a rock song I did called Moving On here that I used programmed drums for. You will be surprised by the amazing sounds you can get when you start learning about plug-ins.

2. Get the gear required to record your music

In order to start recording high quality music you will need certain gear. I know it can get overwhelming with the amount of choices, and looking at videos of huge professional studios you see a lot of outboard gear that can make you confused. Don’t be! All the outboard gear can now be reproduced using plug-ins, all from inside your computer. This method is a lot less expensive and the results are amazing! 

Here is the list of what you will need, and it’s not as long as you would think:

  • Computer

    • Mac/PC, i5 or i7, Ram 8gb or higher, 500gb storage + (Preferably SSD) the higher the better. A great tip to have better performance is to use an external SSD to work on your projects from, so you don’t fill up your computer, making it run smoother.

  • Audio Interface

  • Midi Keyboard

    • Akai LPK25 is my go-to, super simple, portable and works great.

  • HQ Headphones

    • I would go with the Audio Technica ATH-M50x. They are the industry standard for a reason. Amazing for mixing your tracks and hearing every detail.

  • Studio Monitors

    • On the lower price range the PreSonus Eris E3.5-3.5 are awesome. I own the JBL 308P MkII and love them! Keep in mind the JBL only comes with one speaker, so you need to buy two, making it the more expensive option.

  • Microphones

    • Audio Technica AT2020 if on a budget, Sure SM7B if you can afford it! Both are great vocal mics, and the AT2020 can record acoustic instruments too. If your looking to specifically record acoustic guitar the AKG Pro Audio Perception 170 is really good for the price, on the high end go with the Sure SM81.

  • Digital Audio Workstation (DAW)

    • I use Logic Pro X and love it, if you are into hip-hop production, Fruity loops is great, and of course you can’t go wrong with Protools the industry standard

  • Any instruments you play (Guitar, banjo, etc.…)

I will be creating a more in-depth blog going into more detail about the various products, so be on the lookout for that! (If I don’t split this into two blogs you will be here reading forever haha) 


3. Setup your space for maximum productivity

When recording music, the way you layout your recording space is very important. You want to reduce the clutter and have a clean designated spot. Take the time to make it your own. Add color lighting, I use Philips Hue smart lights, but any LEDs can give you a really cool effect and enhance your creativity. Try to organize the wires and set it all up in a way that makes it easy for you to just open up your DAW and press record. The easier it is for you to record, the more likely you will be to keep creating more music, always remember that!

4. Create a recording time schedule 

Try to make a recording schedule. Waiting for inspiration to strike is a losing strategy. The more you record and create, the better you will become. The best way to stay accountable is to treat your recording time as if you were going to a professional studio and paying a lot of money by the hour. This will train your brain to stay focused and produce. I recommend setting chunks of time on your smartphone calendar app and set it to remind you 15 minutes before. So, when you get the notification you know it’s time to sit down and record! If you’re not use to doing this, it will change your life not only for recording, but for productivity in general. So, start implementing it now!

5. Experiment, learn as you go & practice A LOT  

The best way to learn is to experiment, have fun with sounds, twist knobs, and see how it makes it different. This is how I got into music production. The key is to fall in love with discovering new aspects of recording. You know you’re on the right track when you can start a session and a few hours will go by and you will not even notice. Then, when you get stuck on a certain aspect of it, learn how to do it through Google search, YouTube, or hire a mentor who already has the experience that can help you through it on a one hour video call. Just keep moving forward. You’ll be surprised how far it can take you.


Best 3 Apps to Record Podcasts on Android

Spotify Podcast Blog Image.jpg

Mobile apps are making it a lot easier to record your own podcast on the go! You don’t need to go out and buy thousands of dollars worth of gear to be able to record a good podcast. In this blog I will show you how you can start recording a great podcast today, for free, with these apps available on the Google Play Store, from just your Android!

1. Anchor

Anchor lets you record high quality podcasts, without needing to be a tech expert. It is a free, simple, and user-friendly app.

Also, recording a show remotely with participants from across the world is possible. By sending invite links, your listeners and friends have the chance to take part in the show. You can record up to 10 people at once.

Anchor also has analytic features that help to track the audience & monitors how many times each episode has been played / what parts have been liked the most.


2. Podbean

Podbean is considered one of the best apps to discover & play all types of podcasts. The app boosts the viewers listening experience by offering features like volume booster, speed and options to customize playlist.

You can easily record a podcast and mix the voice with background music. Once you are happy with your product, you are able to upload directly to Twitter & Facebook.

3. Speaker Studio

Spreaker Studio will allow you to record, broadcast, and convert your phone into a “radio station”, giving you all the essential equipment needed. When recording a podcast, you have the choice to broadcast it live, or have it pre-recorded / mixed. You can share the content over Facebook and Twitter, and when live, listeners can use a live chat box which lets you & them keep in touch in real time.

Once your podcast is recorded, you are able to upload it on their hosting service and set a title.

The one negative aspect to Speaker Studio is recording can only be done to up to fifteen minutes long. If you wanted to record a longer podcast you have to look for the other options offered in the app.

With tools that are this good, available to you right now for free, the only limit to your show is your creativity! Happy podcasting :)

If you need help making your podcast sound amazing, we offer podcast editing, mixing, and mastering services that can elevate your brand and clearly share your message.

Learn more about all of our podcast production services and hear a sample of our work here. We look forward to adding massive value to your podcast development process.